


Mason J. Lafountaine's Portfolio
We are building balsa wood bridges in order to stress test them and see how much weight they can hold and then do a strength the weight ratio.
I’ve done this project before in the previous year, not much changed from this year except for the student’s designs. This year I went for a little bit of a different design mostly because I couldn’t do the same thing as last year. The design I came up with wasn’t that much different, it was still a warren design, 20″ x 2″ x 1.3″.

The only issue I had with this project was that when we printed out my design on a 1:1 scale, the printer decided to not like me for some reason, and printed it slightly scaled up. So instead of printing 20″ across, it printed 21.15″. When we printed my second side the printer decided to listen to the software and actually print it 20″ across and I ended up with a lop-sided bridge.


My bridge ended up breaking at a much higher weight than I thought it would get to. Sense my bridge was so misshapen I expected it to maybe hold 5kg, it ended up holding 17.3kg.

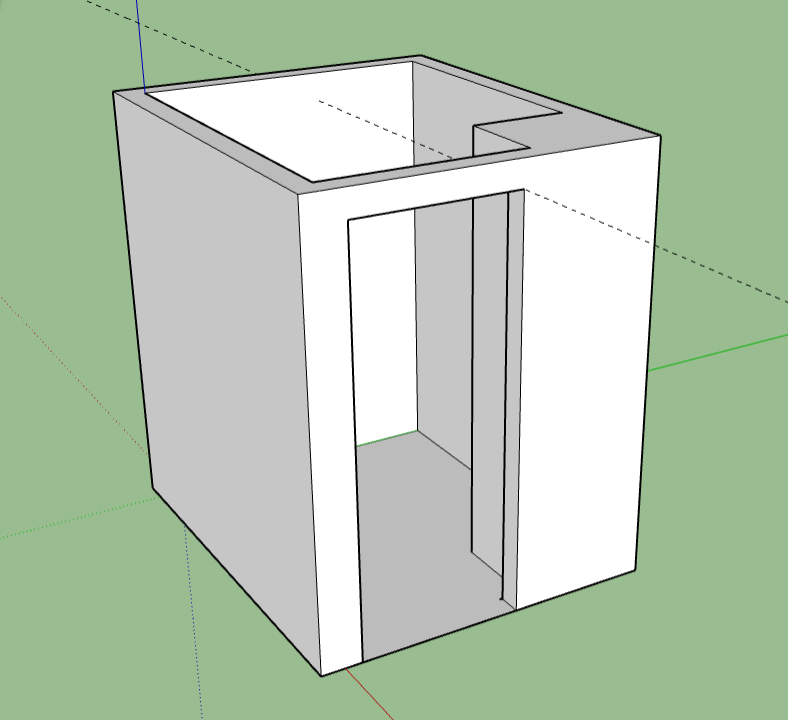
Modeling in SketchUp was very easy for me. I did the same exact assignment last year and am familiar with the software. To get us familiar with the software and ready to model our rooms to scale. We started by modeling wood and plastic objects Mr.D had in his class. This was very easy for me and I ended up doing two models instead of just one. In the next class, we were assigned to draw up diagrams of our rooms so we could use the measurements to recreate our rooms in SketchUp. I chose to do my second-floor bathroom, I chose this room because it is very small and minimalistic, and easy to measure. I didn’t run into any issues while doing this project and found it very enjoyable. I think it’s a very engaging way to introduce students to 3d modeling software.
My main idea for my stool is to make one of those folding outdoor camping chairs, one of the portable ones. I’ve found some reference images online of what I want to do.

With help from Mr. D, I was able to come up with a 3D model of my stool reference image. In the end this is what I went with. we had found the original website from my reference image and used their dimensions. This made our process of modeling a lot easier.

I was able to just pull measurements from SketchUp and put them on paper. This wasn’t a very difficult process and ended up getting finished within one class period.
Cutting my wood was a smooth process and ended up coming out very clean. Drilling on the other hand. When I was drilling the legs I tried to the drill aligned as accurately as possible but pretty much every hole ended up coming out off center.(I don’t have any picture of the drilled holes)

Sanding was not a smooth process for my stool, it was rough. Every single piece on my stool is different because I had messed up the sanding so badly. In the end it came out well enough that it was able to be put together and function as it was intended.

I’m happy with the finished product, I think even though its rough it came out well and works phenomenally. The stool works how it was intended and folds very well. The one thing that that didn’t come out so great were the drilled holes. I drilled 1/4″ holes with a 1/2″x3/16″ countersink, this ended up not being deep enough into the legs and the head of the bolt stick out just enough that they prevent the stool from folding up into a flat flush piece. This could have prevented and fixed but i was happy with the finished product how it was and didn’t want to take it apart again and risk another error while drilling.

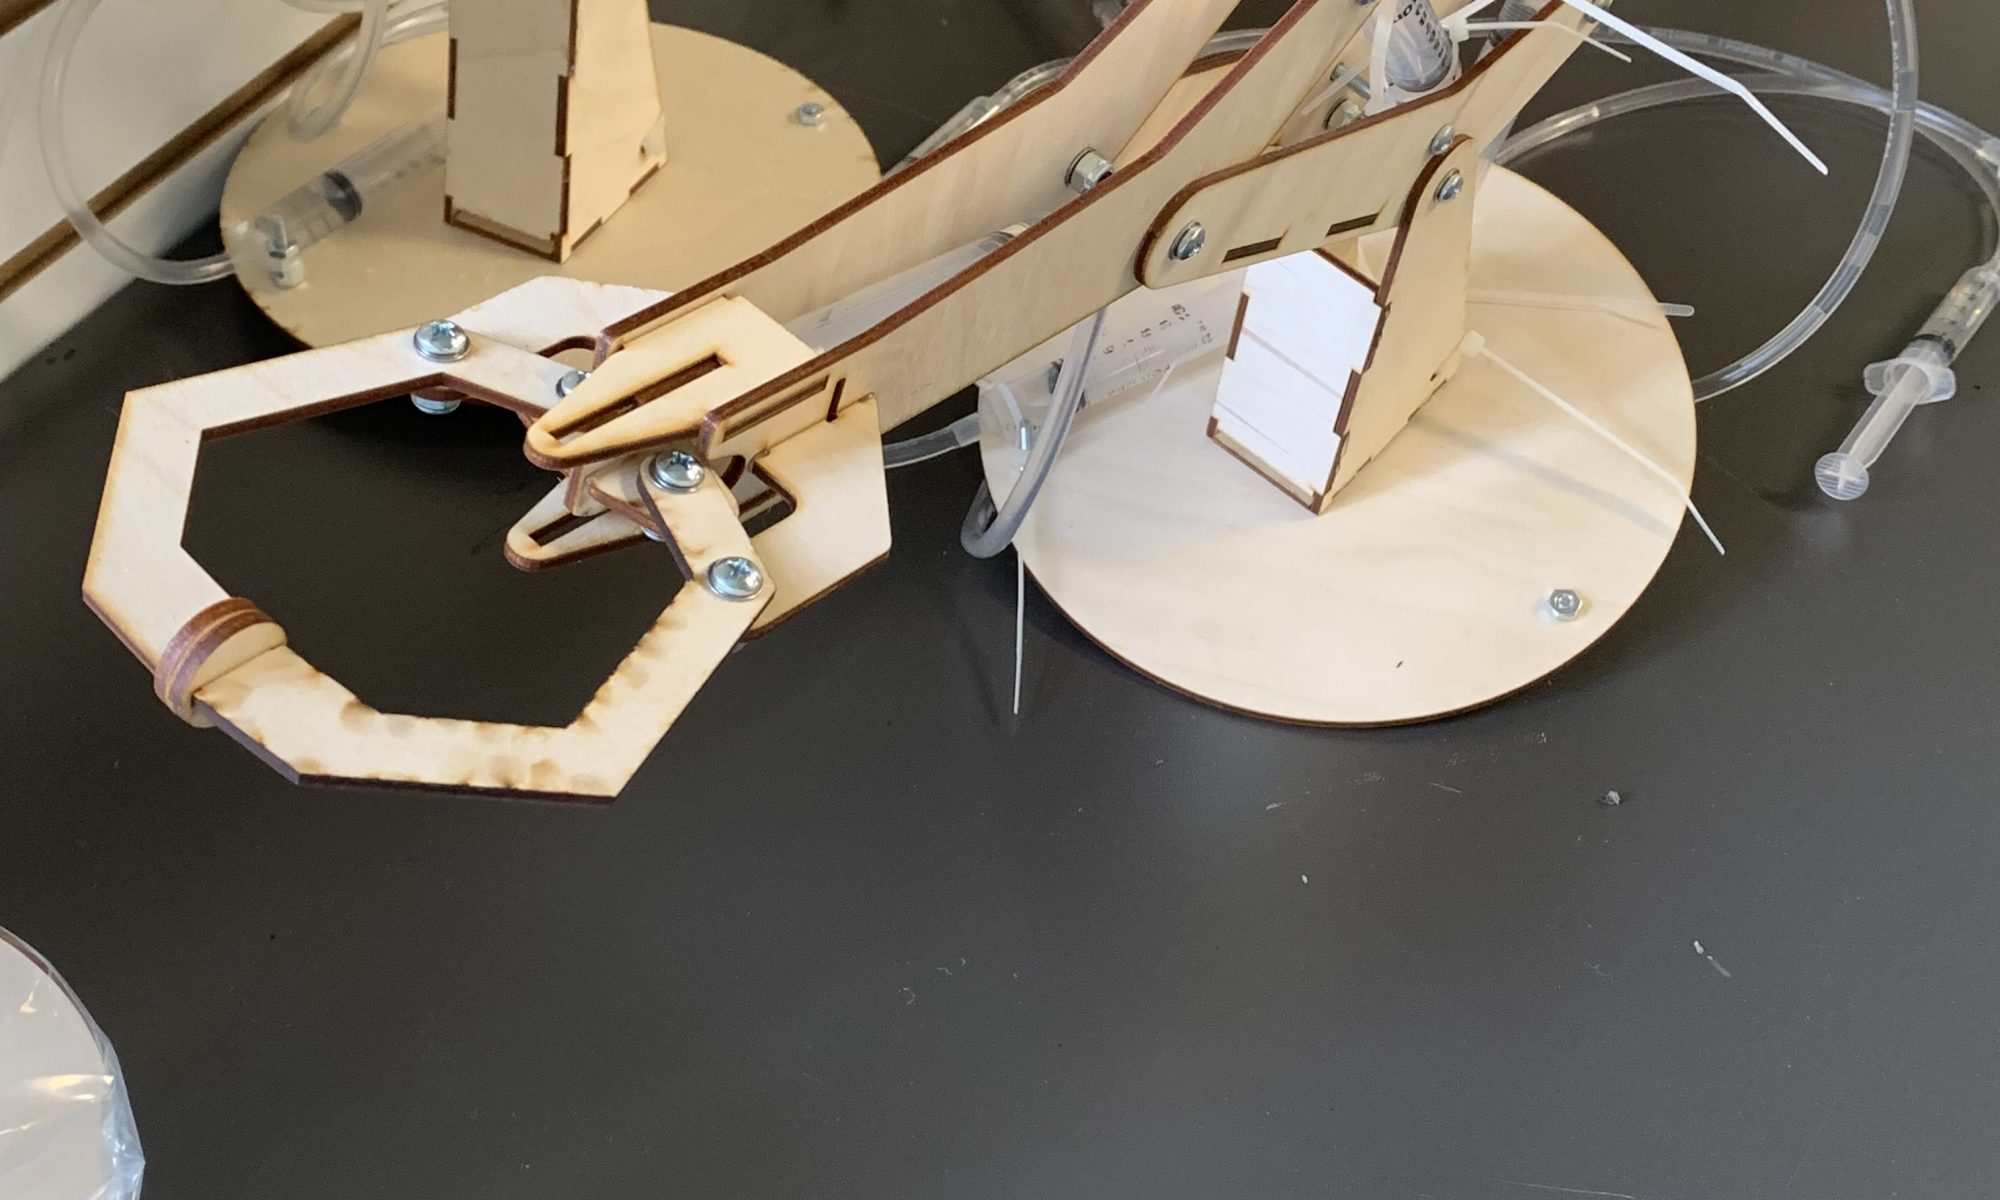
This is our first project of the class, we were instructed to build a hydraulic arm without any guidance or instructions other than a model of the arm.
The first step I took for this project was starting the construction of the base of the arm. My thought when I started this was that I would work from the ground up, literally. I’ve done this project before in the previous year of TECH with little to no issues. I started by putting the base plate of the arm on its bolt stands so I then could start construction of the actual arm. All of the arms construction was from memory from last year so I got through that within a day. The last step I took for the arm was bleeding the syringes, not literally but bleeding them like brakes on a car. From my understanding, we used water in our hydraulic syringes instead of oil because it’s a lot less messy.